As a parent i can testify to the fact that when you have a child of any age mess is an inevitable part of the package. Mum's the world over fight a daily battle to keep organisation or at least some semblance of it in hand.
I am an avid crafter and in one of my craft magazines i came across a pattern for a cot tidy and while the particular pattern they used didnt appeal to me the idea did. I know you can buy these in such places as mother care etc but they are costly and rarely fit things you actually need within the pockets. So I set about making a cot tidy that would suit my particular needs.
Firstly I thought about what we need to have to hand during the night for feeds, nappy changes and so on, i broke it down to the essentials which for us are these:
Nappies
Wipes
Barrier cream (nappy rash cream)
Bottles
O.K. So four essential pockets.....
I measured the end of the cot and decided how big each pocket should be by simply putting a pack of baby wipes on top of my fabric and using that as a guide for that pocket and well you get the picture...
O.K. Mini me has a nautical themed cot so i wanted to stick with this theme while keeping the colours bright and simple. I chose navy blue, white, red, and light blue as my main colours and set about what would end up becoming something of a mission for me.
Hemming the backing fabric
Fighting with the sewing machine, it won!
Choose your design and pin the peices in place on the pocket, after trimming the top with bias binding or hemming.
I used a zig zag stitch around the edges of the applique but you can hem the peices individually if you arent as lazy as me...
I wanted this pocket to fit a pack of baby wipes so i made is as deep as a full pack. Sewing the corners twice to make them strong and snipping off the excess fabric inside....
Note this is my second attempt because i did it the wrong way around the first time and had to unpick it...D'oh!
Inside the corners
Red bias binding to go around the edges (Bias binding is a good way to neaten up rough edges if hemming isnt your forte)
Stitching the pocket into place on the backing fabric
Close up... Me getting flash with the camera
Next pocket... I decided a life saver would be good here as not only does it go with the nautical theme but there are times during a 4am feed that I could do with saving!
Pleated pocket
Hem the sides with a running stitch (I double folded mine to avoid rough edges)
Add on the applique and pin in place while you zig zag sew or hem them into place
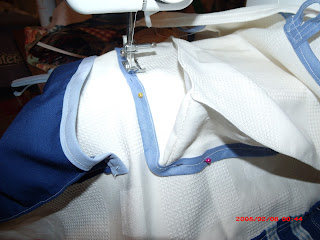
Trim the top with bias binding to hide rough edges or hem as with the sides
Pleat the bottom (but not the top or you wont get anything into the pockets)
Trim with bias binding ( i also stitched down the pleats to add definition but this isnt essential)
Golden rule to sewing: Iron Iron Iron!!!!!
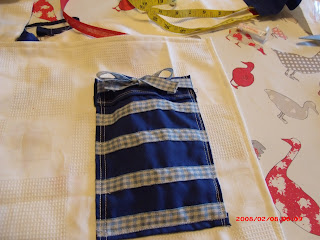
Simple pocket with ribbon sewn on in running stitch then hemmed before sewing onto backing fabric in a running stitch
Another pocket that requires corners...this time i got it right first time!
More bias binding across the top and around the sides
Make a button loop by stitching some bias binding together and attaching to the pocket with a running stitch
Attach to the backing fabric in the same way
This is what it looks like at this point arent I clever!!
I embellished the last pocket with my sons name and a few buttons i had hanging around (Its a good job home made upcycled chic was the look i was going for because there is nothing professionally made about this!)
The finished article (yes i know I need to change the time and date on my camera I just havent figured out how yet!)
I enjoyed making this and I hope that it lasts the test of time and my sons can use it for their children and tell them their nanna made it! Awwwwww


It's lovely Lizzie! It'll be a long time before I attempt those types of pockets though but a brill tutorial!
ReplyDelete