About Me

My photo
An attempt (albeit probably a foolish attempt) to document my way through learning new crafts, sharing my love of crafts i have already learned and generally just a housewife wittering on about the 3rd love of her life.....Crafts!

Wednesday, 4 September 2013

Vikki sponge cake

I named my vanilla sponge with clotted cream and strawberry jam filling after my little sister, firstly because she has spent most of her life having to tell people her name isnt victoria its vikki, secondly because she is one of the most inspirational people I know! And thirdly because she is beautiful much like this cake! (even if I do say so myself!) So little sis this one is named in honour of you!

Start with my basic sponge recipe of equal amounts butter, caster sugar and flour and 4 eggs per 8oz of flour, (depending on egg size) this is based on medium eggs.

For this size cake I used 1lb of each or equvialent conversion (im old fashioned)
And I used half a dozen large eggs.

Cream together the butter and sugar, I mean really give it some welly, the aim here is to get the butter and sugar to lighten in colour and become light and fluffy as we beat air into it, add some good vanilla extract, dont use essence its all chemicals!!! Or use vanilla bean paste, 2 tsps of either one is fine. Mix it into the butter/ sugar mixture. Add your eggs and a tablespoon of the flour, the flour at this stage stops the mixture splitting. Add the remaining flour and a quarter cup of milk and mix well. Dont be tempted to over mix though because this will aggitate the gluten in the flour and your cake will be all spring no sponge! No one wants a cake to twang!
Seperate the mixture between two prepared sandwich tins and bake on gas mark 5 for approx 30 mins, depending on your oven, check with a skewer if it comes out of the middle of the cakr clean its done, if not pop it back for 5 mins and check again, keep doing this until you are satisfied that your cake is cooked.
Leave to cool in the tins for 15 mins then turn out onto cooling racks, allow to cool thoroughly, turn one cake upside down on a serving plate and slather in jam and clotted cream (devon or cornwall your choice) pop the top on, sift over with icing sugar for no reason other than it looks pretty, top with strawberries and serve!!

Try to save some for others though ;) x

Bertie bear

I love to knit and while browsing the newsagents shelves for new knitting magazines a pattern caught my eye, it was in a free supplement in Let's Knit magazine called Christmas gift knits, advertised as 8 quick and easy patterns for the whole family!
I simply fell in love with the bear on the cover of the supplement. I decided I must knit him!

I looked through my yarn stash and decided on a Sirdar crofters wool in various shades of blue and set to work. The pattern was simple to follow and my project grew rapidly, bertie bear as I decided to call him was coming to life!

I decided that because of the varying shades of blue in bertie's tummy that to knit the accompanying waistcoat would cover him up too much and I struggled to really decide what colour to make it that wouldnt drown out his mottled appearance. So I just left it out and gave him a dapper little bow made from east of india ribbon instead. Bertie is now much loved and drooled upon by my 8 month old son! Bless good old Bertie!

Little sister's wedding

When my little sister announced that she was getting married I was obviously more than a little excited!
 
I offered to help in any way I could, and my sister darling that she is asked if I would mind making some bunting.
 
NOW
 
My sister probably didn't expect me to go to quite the lengths I did in order to make this bunting just a tad special but it was for my only sister so I went the extra mile.
 
I went online and got the dimensions of the hall they were using for the meal and worked out how much bunting would be needed to fit it perfectly.
 
The room had steel struts (builders of the world unite in correcting me in the terminology but for the purposes of this they are struts!) so I counted them, worked out (as best I could) the approximate length of said struts, multiplied that by the amount of said struts and got on ebay...........
 
No not to buy the bunting!!!!!!
 
I bought tons of bias binding and some fabric that I knew my sister would love. When the fabric arrived I poked around in my scrap fabric stash and came up with more than enough fabric.
 
I cut the flags and because I was in extra mile mode decided to trim each one with bias binding so that they were all neat and tidy with no rough edges and looked just that little bit more classy than a pinked edge (crafters know ok they just know!)
 
I am not ashamed to say that this took weeks, as I was doing some and leaving it when I was seeing bias binding in my sleep.
 
Also in my wisdom I decided that I'd take care of the confetti situation...........To be fair I did see a picture on pinterest which totally inspired me and I got all excited and possibly bulldozed my sister into agreeing but................confetti cones it is!
 
Meanwhile.....
 
The bunting flags look suspiciously like a stack of thongs.


I ordered some card for the confetti cones, swore a few times when it was a completely different shade to that described and ordered another lot of card.
 
When it arrived I drew around the dish that sits on my scales cut the rounds into thirds (as accurately as I could eyeball it) glued paper doilies to the outside with my fantastic new discovery the glue mouse! Glued them into cone shapes, trimmed rough edges, stuck little polka dotted satin bows to he front and sat back quite pleased with myself.
 
I filled them with a mixture of Asahi rose petals (dried) lavender, jasmine and pink heather. All chosen for specific reasons. Roses because they are beautiful and smell gorgeous, lavender for the scent, jasmine because when my sister was growing up she always wanted to be Princess Jasmine from the Disney film Aladin and Heather for luck.
 
The finished result wasn't bad at all :D
 
I got a much loved (code for a bit battered) white basket, wrapped ribbon around the handle and glued tiny rose buds around the rim. put wadding in the bottom and tucked some lovely fabric over and around the wadding to provide a cushion to sit the confetti cones on to prevent spillages and packed everything away for transportation to the wedding venue.
 
I finally finished the bunting by attaching the flags to long lengths of bias binding (for that finishing touch and professional look) and to prevent it looking like knickers on a washing line as my younger brother so kindly put it I added tiny lengths of polka dotted ribbon between the flags. I was quite pleased with the finished result!


Oh my cod! Filleting salmon is a load of pollocks!

Firstly let me apologise for the disasterous pun's in the title of this post, my only excuse is that filleting this behemoth was so stressful it addled my mind!
 
My best friend Angela looked at me agog when I informed her that I was going to fillet the whole salmon.
 
 (mainly because when it came to cooking it I discovered that despite all my best laid plans it didn't fit in my oven..................)
 
 But I took on the task with gusto.....
 
for the first 5 minutes.
 
 
Picture this, I am stood looking at what can only be described as a gargantuan fish sat on my little Gino DiCampo butchers block, which until this moment I had thought was of a fair size as chopping boards go. Mr Fish is looking at me with accusing eyes and there is me mulling over where to start.
And if I'm honest looking more than a little bewildered.
 
'Right Liz think..........'
 
'How did Rick Stein do this? '
 
The head!!!! The head comes off first!!
 
So I gently lift the gills so that I can find the optimum point at which to decapitate the beast and then...............the blighter bit me! Ok so I may have been in control of the very dead fish at this point but I refuse to take responsibility for my finger brushing its mouth which I now can reliably state is lined by blinkin' sharp gnashers! It drew blood!!!
In return for this onerous deed I decided to chop its head off with a little more gusto than was really necessary but revenge is sweet!
 
Might I add that my best friend is still observing this minor battle with more than a touch of amusement in her eyes (which I chose to ignore).
 
Our fishy friend is now looking like Marie Antoinette post guillotine and im feeling very pleased with myself that I managed to do it without losing any significant amount of fish flesh or my own fingers.
 
I mentally call upon the inspirational musings of Mr Stein and pray to that God of the cockle that he guide me in my endeavours. I remove the fins (which is more difficult than it sounds). I'm a reasonably intelligent woman but I found it a little suprising that the fishes fins are attached to the body by a joint. Retrospectively I have no idea why this was such a surprise because anatomy isn't something I'm particularly bad at but I digress, it was a shock at the time.
I sharpened my knives, ran my filleting knife (or the only knife in my kitchen that looks anything like a filleting knife) down the back of the spine and started to gently prise the flesh from the rib cage.
 
Salmon are slippery little suckers!!!!!!!
 
Fast forward to both fillets being removed amidst a shameful amount of swearing and one or two open threats of bodily damage to an already dead fish and voila!!!!! two lovely-ish looking salmon fillets complete with 'oh cod' bones...........................
 
Now I am one of those ultra organised (hahahahahahahaha!!) mothers who has everything in her handbag ready for any eventuality, not because everything gets thrown randomly in there and if it cant be found anywhere else it will be in mums bag, honest! So I delve into the depths of the bag looking for tweezers.
 
Aha!!! Now the inside of my handbag smells suspiciously like a fishmongers because I stupidly didn't wash my hands before delving into the bag but who cares? I found the tweezers!!
 
An hour and several bouts of bad language later...........
 
I give up! If there are any more bones in that bloody thing its tough!
 
Lined the inside of my largest baking tray with parchment paper backed with foil (its brilliant stuff you can buy it in Sainsbury's) threw some black pepper and a sliced lemon over the now decidedly ragged looking salmon fillets topped with more of aforementioned paper/foil and shoved into the fridge til the following day when it was needed.
 
Cooked it in the bottom of the oven on gas mark 3 for an hour, while we all went to church, no I'm not joking this was part of the catering for my sons christening!! when we got back the salmon was cooked perfectly, soft and flaky and I got lots of compliments about it so I forgave the salmon for biting me!
 
This is an adventure that while I am glad I embarked upon it, I will not be repeating the journey............................. Mr Fishmonger is my new best friend.


Saturday, 6 July 2013

Hokey Pokey Chocolate Cake

 
Take one chocolate cake recipe as written up already on the blog, add one honeycomb/hokey pokey recipe.
 
smash up the hokey pokey once its cooled down and mix half into the chocolate cake batter. Cook in cupcake cases or in a bunt tin.
 
Smother in chocolate butter cream
 
sprinkle with remaining hokey pokey
 
I mean seriously what could possibly be wrong about that combination???????????
 
 
Some things are just right without trying :D


Choux Fly Don't Bother Me!

Some people called me crazy.
Others called me brave.
 
There was nothing for it............
 
I took on my ultimate foe........
 
 
The one and only Choux Pastry!
 
Let the battle begin!!!!!!
 
 
Ding! Ding! Ding!
 
 
O.K. all jokes aside this isn't as difficult as you might think. So long as you follow the recipe ( I got mine from Richard Bertinet's book 'Pastry') very carefully and to the letter.
 
Its hard work but it is sooooo worth it to see the look of sheer admiration on the faces of your friends and family when they think you pulled off nothing short of a miracle.
 
So..... I exaggerate slightly but hey, Its my blog and I'll brag if I want to!
 
 
Anyway grab this book off the shelves (Tesco's is selling it cheaply at the minute) and have a nosey through it. Loads of hints and tips from a professional and lets face it if I can make Choux pastry and not make a complete hash of it so can you!
 
 
One thing I will suggest is that if you think the choux buns are done leave them in the oven for an extra 5 mins just to dry them out a little more and make sure the buns are a really golden brown. if you take them out too early they will go flat and all that hard work has been for nothing. (yes it did happen with the first batch I baked!
 
Same batch but second lot to be baked I left in a while longer and they turned out great.
 
 
Filled them with Crème Patissiere and top them with dark chocolate for profiteroles or be a flash harry and dip them into caramel and make a croquembouche complete with spun sugar.................I plan to do the flash harry option fairly soon so stick around to see what a balls up I make of the whole thing :D


Sunday, 23 June 2013

Cinnamon Buns from the Hummingbird Bakery Home Sweet Home cook book

I don't know about you dear reader but my childhood featured some very basic cakes, iced fingers, cinnamon buns, Chelsea buns and custard tarts are the ones that immediately spring to mind.
The likes of the ever lusted after battenburg was for the grown ups and there was absolutely no chance of getting my grubby little mitts on a slice of blackforest gateaux!
 
Cake for us as children was very much an age divided issue, grownups got the good stuff, however that's not to say that what we got wasn't great. The good old cinnamon bun was something I always looked forward to. So while I was flicking through my slightly worn out copy of the hummingbird bakery's 'Home Sweet Home' I came across a recipe for cinnamon buns and thought to myself AH HA! I must make these!
 
The recipe was really simple, but being a bread based dough it needs the usual bread making processes, activation of the yeast, proving, knocking back, rising and so on. This may seem like a lot of fuss but with one batch of what seems like a very small amount of dough I managed to get 16 generously sized cinnamon buns, which I might add my children were fighting over!
 
I used the recipe in the book to its fullest and made the cream cheese frosting it suggests as a topping but I have to be very British and say it would have been better with some gooey royal icing over the top.
 
My husband took some with him when he went fishing and 'the fab four' as they like to be known say they tucked into them like school boys on an outing and that is compliment enough for me!


Wednesday, 19 June 2013

Last Minute Birthday Cake Dash!!!

So my 8 year old son decided to come home a few weeks ago and announce 'mum i need a birthday cake to take to school for tomorrow!'
 
AAAAARRRRRRGGGGGGHHHHHHH!!!!
 
O.K. This is where i admit that i am a bit of a food snob plus i was stoney broke so I raided my trusty baking cupboard.
 
I whipped up my never fail chocolate cake (see previous blog) andthrew some icing at it. found some fish i made from sugar paste a while back for another project that didnt come to fruition and kinda threw them at the cake too..................
The resulting cake looks far more carefully done than it actually was but armed with butter cream and some gel food colouring you cant really go wrong!
 
Here's one i made earlier! :D

Over the Rainbow Cupcakes

After having my youngest son on new years eve it occured to me that it might be a good time to get all of my children baptised. I dont know why I feel it is important because on the whole I am not particularly religious but i do know that it would mean alot to my family.
Plus I've never been one to resist an excuse for a big party!
 
So I got my thinking cap on and while having a chat with my cousin-in-law he suggested a Mad Hatters Tea Party theme.
 
I loved this idea so guess what? I'm going with it!
 
Might I add that I am going soooooo totally kitsch with this party that even Nigella Lawson would swoon! (Yes i have the drinks fountain complete with lights at the ready!)
 
Anyway I digress.
 
Ive seen alot of people do rainbow coloured sponge cakes by dying them with gel food colouring and it has worked out well by baking them individually, also ive seen some marble effect ones, so I decided to have an experiment to see if i could come up with rainbow cupcakes! (the Mad Hatter would be proud i feel!)
 
I started with a basic sponge mix which for me is equal amounts of caster sugar, butter and self raising flour, a tbsp of milk and 3 eggs per 8oz of the above ingredients, depending on the flour i use i sometimes add a teaspoon of baking powder for a little extra lift.
 
I made quite the quantity of batter! 1lb of all of the ingredients and 6 eggs!
 
I divided the mixture between 5 bowls and coloured them all with a contrasting colour (I had red, green, blue, yellow and purple)
 
 
I put cupcake cases in my tray and started to layer the colours, first red then purple then blue green and yellow (as in a rainbow)
 
 
Well i wont patronise you by telling you how to do this because I assume that i you are smart enough to have found my blog then you are smart enough to know how to put cake batter into a cupcake case!
 
I baked them for approx 25-30 mins on gas mark 6, when you think they are done check them with a skewer and if it comes out clean they are done. If not then pop them back for 5 more mins and check again.
 
Here is the finished product!
I have to admit im quite impressed with the colours, I do need to work on how to stop them dipping in the middle but that will come with practice and possibly piping the batter into the cases. I cut one in half so you can get the full effect of the colours going on!
 
SO for the christening i thought i would shock everone by having plain white icing and leaving the colour to the inside!

Wednesday, 5 June 2013

Talacre Beach

Wales is full of beautiful places to visit and I discovered one last weekend. We packed a picnic some blankets and plenty of sunscreen and set off north. (which considering we live in north Wales isnt going very far)
 
Everyone has heard of Rhyl, its a weel known pleasure beach and provides family fun for alot of people, but if you go just a little further along the coast you will find Talacre.
 
There is a tiny holiday village and a couple of shops and cafes. Which at £1.50 for a childrens meal and drink, couldnt possibly be more reasonably priced. Then there is beach, miles of glorious sandy beach with a little lighthouse stuck in the middle of it. Quaint is not the word!


I love finding places like this in the UK, we underestimate our own beauty far too often!
 
Here are some other random pictures I took along the way on that glorious summers day!


Monday, 20 May 2013

Nautical Quilt For a Naughty-cal Boy (Geddit?)

My son needed a quilt to go with his new curtains so I made one of those too, its thin so is more fo a bedspread than an actual quilt but im proud of it just the same :)
 
Firstly i grabbed as much fabric as I could that sort of matched with the theme and luckily for me I had already bought a wagon load of nautical themed fabric in anticipation of future projects....not because i loved the designs and HAD to have them honest!
 
In this instance im not going to go into the rudimentals of quilting other than to say this....
Measure everything...add a bit of fabric...... Measure again and keep measuring all the way through the process to keep your design even and not wonky when you come to attach the wadding on the back.
 
Wadding......I cheated *hangs head in shame*
While browsing on my beloved Ebay I found some wadding that had the backing fabric already attached..........HOORAYYYYYYYYYYYY!!!!! What a revelation! The hard work is done for you and all you have to do is the design diva bit on the front! FANTASTIC!
I ordered quite a bit...............
 
Pin your front fabric once its all stitched together to the backing fabric and wadding and keep checking for creases as you do this because there is nothing worse than doing all that work only to find you have missed a crease and the whole damn thing is wonky (can you tell Ive done this?)
Edge with bias binding and stand back to admire your work.
 
SIMPLE!
P.S. I know its a little uneven in places but frankly.................its home made!!!!


Applique Curtains For My Little Sailor

I recently decided to (probably foolishly) make as much of my sons bedroom soft furnishings as I can. As a fully fledged craft and upcycling addict I love the feeling of sitting back and thinking to myself 'I made that!'
Apart from my upcycling and craft addiction i have to admit to also being a bit of an Ebay dependant shopper, so I set about the task of finding fabric's that would fit with the nautical theme that is currently becoming apparent in his room.
Now to say that his bedroom is a box room would be generous at best, it is more shoe box than box room! I bought a midsleeper bed (storage underneath, I'm not just a pretty face, I have moments of intelligent revelation) and a wardrobe in navy blue that closely resembles the Tardis.
I hit Ebay with a vengeance and found lots of really cheap offcuts, remnants and the occasional fat quarter of fabric, I started clicking like a woman posessed and as a result I now have FAR too much nautical themed fabric!
(Standby for nautical themed everything for a while........I wonder if my bathroom could stand up to a nautical blind.......)
I still have some yet to be delivered!
Its a good job scatter cushions are easy to make!
 
Im going off topic slightly.......where was I?.....oh yes...curtains!
 
Simple steps to making basic (unlined) curtains.
 
  1. Measure window, length and width. Make sure your finished curtains will close and still have a slight gather. (I guessed at this and bought fabric that was the same width as the window so that a pair of curtains would add up to double the width)
  2. Choose your fabric wisely. Ask yourself what you need from your curtains. Do you want them to protect your privacy? Block out sunlight? Look pretty but serve no real function? Once you have decided this you can pick your fabric (Its not all about the pattern its about the thickness and practicality of the fabric too) As my sons room has vertical blinds the curtains only needed to serve as room dressing so I selected a light polycotton blend in blue and white stripes.
  3. Cut the fabric to size allowing an additional 12cm's in length for hemming (you will understand why shortly) When measuring and cutting fabric remember you cant re-cut it if you cut too short so always always always measure twice and cut once! (having a dad in the building trade taught me this, Its amazing how things can cover a multitude of purposes!)
  4. Get your iron out.....No I havent completely lost the plot, It is important that yu get the hems straight and this is probably the most fool proof way of doing it. Tape measure at the ready!!! (mine is usually around my neck because my 5 month old son likes to play with it, in fact I have at least 3 of them randomly dotted about the house) fold the fabric over 1cm and iron flat (be careful to make sure it is exactly straight at the edges but dont worry if it isnt exactly straight along the length of the fold because the fabric may not have been cut exactly straight) Do this at both ends of both curtains. Do not sew yet!!!!
  5. Now you need to do the length of the curtains, do as above and iron a 1cm fold down the length of the curtains and repeat to hide rough edges. Sew these folds in using a basic running stitch on your sewing machine.
  6. Now go back to your iron and fold over the top and bottom hems 5cms and iron into place. Sew along the hem approx 5mm from the edge. Do this top and bottom of both curtains and you are almost there!
  7. Attach header tape to the top and stitch into place using the same basic running stitch.
  8. Yes I know the header tape in this photo is on back to front i had to unpick it and do it all again!!!!!!
  9. So tape on the right way this time! We can continue!!
  10. Once this is done you can hang the curtains after a quick go over with the iron, or if like me you have to go that extra mile you can add applique detail or many other things like bias binding on the edge instead of hemming....let your inner design diva go wild! 
Applique detail.
 
I picked up some nautical fabric remnants on ebay for a matter of pennies just so that i could use the designs that were printed on it. I got inspired when I saw it. So for fear of being patronising I will keep the instructions for applique simple. 
  1. Cut out applique
  2. Iron it flat 
  3. Attach it to backing fabric with Bondaweb (you can either buy the type that comes in sheets that you can cut out or if you are like me and always have some handy just pop a few lengths under the applique making sure its not sticking out and iron on in the position you want it to be on the finished product.
  4. Sew around the applique using a zig zag stitch keeping the edge of the applique in the middle of the stitch. If you are a novice on the sewing machine (if you arent you probably find this blog somewhat boring) then dont be afraid to go slowly, it is better to go one stitch at a time than to have to keep unpicking untidy sewing because your brain has said stop but your foot has been a few seconds behind listening to it! Beware puckering too, it doesnt look pretty hence my constant ironing to keep the fabric as flat as possible!
Repeat this step until you are satisfied with the result, tidy up any loose threads by pulling them to the back and snipping (im pretty sure there are youtube clips available on how to do this because lets face it there are youtube clips for everything!) Iron your curtains and go hang them up!!!!

I hope this tutorial is helpful and not too rambling as I have a habit of getting off topic now and then! Ive tried to keep it basic because I find some tutorials can be a bit patronising and come across as idiots guides. My tutorials are aimed at people with a modicum of common sense! 


Saturday, 11 May 2013

Doughnut Cupcakes!

I got this recipe from The Hummingbird Bakery's 'Home Sweet Home' cookbook. It is the ultimate indulgence and effectively two cakes in one, YAY! Always a good start!
 
I dont usually give the recipes for my bakes but I am in this case on request from a good friend so give it a go and enjoy the results....
If like me you are on a diet then you may allow yourself to sniff the cakes and look at them but unless you want to be on the treadmill for an extra couple of days DO NOT eat these! They are in no way low in fat or sugar....
 
 
Ingredients
 
For the sponge:
  • 70g (2 1/2 oz) unsalted butter, softened
  • 210g (7 1/2oz) plain flour
  • 250g (9oz) caster sugar
  • 1 tbsp baking powder
  • 1/2 tsp salt
  • 210 ml (7 1/2 floz) whole milk
  • 2 large eggs
  • 100g (3 1/2oz) strawberry jam (or just spoon it straight from the jar and save yourself the bother of weighing it)
 
For the cinnamon sugar:
 
  • 1 tsp ground cinnamon
  • 100g (3 1/2 oz) caster sugar
 
 
For the doughnuts:
 
  • 250g (9oz) plain flour plus extra for dusting
  • 1/4 tsp salt
  • 1/2 tsp baking powder
  • 35g (1 1/4oz) cold unsalted butter cubed
  • 35g (1 1/4oz) caster sugar
  • 1 large egg
  • 125ml (4 1/2 fl oz) whole milk
  • 1 litre (1 3/4 pints) sunflower oil for frying
 
 
Preheat the oven to 170 degrees centigrade (gas mark 3, 325 farenheight) and line a muffin tin with paper cases.
 
  1. First make the sponge. In a free standing electric mixer with the paddle attachment (or hand held mixer, or good old muscle) mix the butter, flour, sugar, baking powder, and salt together to form crumbs.
  2. In a jug mix together milk and eggs
  3. Mix the wet and dry ingredients til they form a smooth batter. ( this is quite a wet mix and if like me you are used to the equal measures method of cake baking and getting quite a stiff batter dont be phased by the liquid type batter this makes)
  4. Fill the paper cases to 2/3 full
  5. Bake for 20-25 mins or until golden brown, check they are cooked by lightly pressing the top of the cake and seeing if it springs back.
  6. Leave to cool on a wire rack
  7. While the cakes are cooking get your cinnamon sugar ready, I wont patronise you by explaining in detail how, just chuck the ingredients in a bowl and stir!
  8. Now for the doughnuts (in my opinion the best bit) Sift the flour, salt and baking powder together in a bowl and rub in the butter to form crumbs. Add the sugar and mix.
  9. Put wet ingredients in a jug and whisk to break down the egg, add to the dry ingredients and mix to form a dough.
  10. Turn out onto a lightly foured surface and either roll it out using a rolling pin or do like i did and squish it down with your hands. Cut the shapes you want (book says small rounds but i didnt have the right cutter so i just used a knife and cut into squares)
  11. Heat the oil in a large saucepan giving yourself plenty of room inside it. Using a slotted spoon lower the doughnuts a few at a time into the oil and fry until medium golden brown, carefully lift out of the oil and set onto kitchen towel to drain.
  12. Let them cool for a few minutes before tossing in the cinnamon sugar and setting aside to cool fully.
  13. put the butter, icing sugar and cinnamon into a bowl and mix til there are no big bits of butter then slowly add the milk. Now whisk like the holy clappers of hell OR let a machine do it for you until the frosting is light and fluffy.
  14. Gently cut a small well into the top of your cupcakes and spoon in half a tsp of strawberry jam before replacing the top. swirl on cinnamon frosting and top with a little doughnut.
 
It sounds like alot of work and to be honest it is if you arent used to baking on a daily basis like me but it is well worth it!!!!


Tuesday, 30 April 2013

My Chicken Pot Pie

I make my pie in a cast iron flat pan kind of like a paella pan but deeper but you can make the filling in a sauce pan and transfer it to a pie dish. Im just lazy about washing up and like to make as little as possible (although after a baking spree my husband would be inclined to disagree with that claim)
 
This is a really simple dish which is why my kids love it, its not complicated or full of a thousand ingredients.
 
The quantities you use for this pie depend greatly on the size of the pie you want to make. My pie dish (paella pan) is about 16 inches in diameter, and about 4 inches deep so the quantities below are designed for that pan. to make a smaller pie simply reduce the quantities across all of the ingredients.
 
I used:
2 large packs of chicken thighs approx 1.1kg each bone in skin on.
4-5 thick rashers of bacon
approx 1 tbsp plain flour
3 chicken stock cubes
boiling water
1 pack pre made puff pastry (i never make my own puff pastry its just too damned time consuming!)
salt
pepper
chopped sage or other herb of your choice.
 
Yes that really is all you need!
  • Put the chicken thighs in a large pot.
  • Crumble over stock cubes, cover to 1cm above meat with boiling water.
  • Bring to the boil.
  • Turn the heat down slightly and simmer for around 45 mins or until the chicken thighs are cooked through.
  • Remove the chicken thighs from the stock and retain the liquid.
  • Allow to cool and remove the skin and bones from the meat, set the chicken meat aside.
  • Cut up the bacon into strips, In a frying pan, or in my case in the Paella dish saute the bacon in a little olive oil until browned slightly.
  • add the flour and cook on a medium heat, stirring all the time for approx 2 mins til the flour absorbs the fat in the pan.
  • Using a ladle add a little of the retained stock at a time to the flour mixture until a thick-ish sauce has been created. Stir continuously to avoid lumps.
  • Add the chicken to the sauce.
  • Roll out the pastry on a floured board
  • Put the chicken and bacon mixture into your pie dish
  • Put the rolled out pastry over the top, crimp, stab a hole in the centre to allow steam out during cooking.
  • Cook on gas mark 6 until the pastry is brown and risen (approx 20 mins)
  •  
  •  


My 'Whip it up quickly' Chocolate Cake

Occasionally I need to whip up a cake at short notice and as I am not one to present people with a cake that does anything other than make them salivate on viewing it, I tend to have this on standby.
 
8oz Unsalted Butter or Margerine (I use stork)
8oz Caster Sugar
4 Medium Eggs (or in my case 2 medium eggs and 3 bantam eggs)
 
Please note that bantam eggs are like rocking horse poo (virtually impossible to aquire) unless you know someone who keeps bantams or you keep them yourself, If you are lucky enough to fall into one of the latter two categories, when baking I follow the rule of thumb that 3 bantams eggs is equvalent to 2 medium eggs and so far it has not failed me.
 
7oz self raising flour
1oz really good cocoa (I use green and blacks but you can use whatever brand you like)
1 tbsp of milk
1tsp of instant disolved in 1 tbsp of hot water
1/2 tsp vanilla bean paste (or something else vanilla-esque eg essence)
1 tub of betty crocker vanilla fudge frosting
 
My method uses a free standing mixer but I will write the instructions as though by hand because I am aware that not everyone is lucky enough to have one or bakes enough to justify the expanse of buying one.
Prepare 2x 8inch sandwich tins and preheat the oven at gas mark 5 or equivalent temp
  • Cream together the sugar and butter til it is light and fluffy (this can take a while and an electric hand whisk can be your friend here).
  •  
  • Add the eggs and 1 tbsp of the flour and whisk until fully combined (the flour stops the mixture curdling which can effect the rise of the finished cake).
  •  
  • Add the disolved instant coffee and vanilla bean paste.
  •  
  • Sift the remaining flour and cocoa powder together into the wet mix and combine using a folding action (please google this if you arent sure as its important to keep the air inside the cake and avoid over working the flour.
  •  
  • When the mixture is fully combined, divide between the sandwich tins and level the mixture using a spatula.
  •  
  • Bake for approx 25-35 mins (this depends greatly on your oven) to check if the sponge is cooked insert a skewer (i use a bamboo one) into the centre of the cake and if it comes out clean the cake is cooked. If you dont have a skewer press the top of the sponge gently with a clean finger and if it springs back it is cooked, if it gives slightly it needs to go back in the oven. If your cake is not cooked return it to the oven for 4-5 mins then check again (it can go from uncooked to over done in less than 5 mins)
  •  
  • Allow to cool in the tins for around 10 mins, then turn them out onto a wire cooling rack, it is important to have them on a rack like this because it allows the air to circulate under the cake allowing for even cooling and avoiding a steam build up within the cake which can effect the final product.

  • When the cakes are cooled fully smear a little of the frosting onto the surface of your plate or cake stand to stop your cake sliding off. put the least pretty cake on the bottom with the top facing up. smear with the frosting and pop the second cake on top in the same way. Top with the frosting and decorate to suit you. I used fresh strawberrys with mine but you can use anything you like. A cadburys flake crumbled up or some malteasers dotted around the edge might be nice... or both! Whatever its up to you, have fun with it! If its fun to make then it will be fun to eat!


Paul Hollywoods Savoury Couronne

I initially saw this on Paul Hollywoods T.V. Programme 'Bread' and it immediately sparked my interest...
 
I love a challenge even when it poses what would appear to be impossible technical issues. Most would say I'm ambitious, I would say I'm bloody stupid!
 
So I set about making this couronne despite the fact that Mr Hollywood has stated both in his T.V. programme and the accompanying book (yes I had to have it) that this recipe is for the advanced baker.
I have only had successful loaves of bread in the last month or so having finally mastered the art so would hardly call myself an advanced baker but sod it here I go!
 
I cant keep calling Mr Hollywood by that name it takes too long to type.
(May I call you Paul? Yes? Cool!)
 
O.K. so I opened the book at the relevant page which I have found is always a good place to start...
I ran down the list of ingredients and made sure that I had everything I needed having bought supplies the previous day. I opened the fridge to discover that my darling husband had eaten more than half of one of the packs of parma ham 'because I wanted ham' (you can imagine the language that spewed forth from my mouth dear reader, I confess it was not pretty or lady like and I may have promised physical damage to his person.)
 
So i collected together the remaining  parma ham, the mozarella, strong white bread flour and other ingredients and set to work.
 
The recipe for the brioche base of this bread is actually quite simple to make and I quickly got to the stage of the first rise, I popped it into a lightly oiled tupperware tub and got on with the other recipes I'm going to be featuring shortly. An hour later I faced what can only be described as a baptism of fire.
 
I should have taken photo's at each stage but to be honest I didn't want to get dough on my camera!
 
I popped the risen bread dough onto a lightly floured work surface (what is lightly floured anyway? whenever I 'lightly flour' something everything sticks to it and I end up getting both annoyed and extremely messy!) rolled it out into something resembling a rectangle and (get me I'm flash) tacked the side nearest me to the work surface (this is basically squishing the edge of the dough into the worktop so that it doesnt wiggle around like a loony while you are trying to work with it).
 
I laid what was left of the parma ham onto the dough, tore up the mozarella (feeling all mama mia about myself and tossing it at the dough with what I thought was flare but what was actually me looking a total wally) I then stepped outside...
 
No I wasnt running away from it, I was on the hunt for some basil that wasnt dead or dying because it turns out that my green fingers arent actually green they are septic. Herb hunt over, I scattered the paltry few leaves I had managed to find that didnt look too pitiful over the dough, grated on some parmesan and looked at it with something akin to dread...This is it...The bit i saw on the T.V. and thought to myself 'I can do that...' It doesn't look so easy now...
 
Deep breath!
 
I rolled the dough towards myself enclosing the ham, cheese and basil within...
 
I gently rolled the 'sausage' stretching it slightly as I went to achieve the correct length...
 
Cut the 'sausage' lengthways down the middle AAAAARRRRRGGGGGGHHHHHH why am I so tense?????
 
Turned the half 'sausages' upwards so that the filling was facing the ceiling...
 
Grasped each end in my hands firmly and...
 
 
WAIT! This is NOT going to work!!!
 
(To myself) Get a grip woman its only bread dough, its not going to bite you!
 
So in the end instead of doing the ultra flash ultra cool Paul Hollywood flick of the wrist and spin the dough through the air to achieve the twist, what I actually did was gently (ever so gently, pathetically gently in fact) hold the ends together at one end and turn it as quickly as I could while praying that the filling stays in place, and then twist at the opposite end in the opposite direction...
 
I did it! well it looks sort of like Paul's (he did say I can call him that, see above) couronne and thats good enough for me. Now I have to get it on the baking sheet to prove and I panic...
 
How the hell am I going to move that without it falling to bits?
 
I know...(rummage in the cupboards) I have a steel thingy I use for moving sponge cakes, no idea what its called but it looks kind of like a wonky guillotine blade. I slide the wonky guillotine under the bread and lift it up while sliding the baking tray underneath (this is no mean feat people, I should have had a standing ovation for this but alas I got none)
 
Set aside to prove for approx 1 hour...
 
Bake at 200 degree's (oh bugger whats 200 degrees in gas mark again?... gets out android phone and looks up gas mark temp conversions... wait one site says gas mark 7, another says gas mark 6....Check my Delia Smith book for the conversion table in the front (thank you mum!!!!).....Grrrrr Delia says 7, O.K. lets go with that.
 
(This temperature debate was going on about half an hour previously to my putting the bread in the oven because as we all know Preheat Preheat Preheat!!)
 
Popped the bread in the oven and forced myself to walk away...
 
The resulting loaf looks like this...
 
Please note: DO NOT try to take this off the baking sheet before it has cooled for a while or you will be convinced you have a dreaded 'soggy bottom' when in fact its the cheese making an escape. I'd suggest waiting for around 15 mins before you move it to the cooling rack.
What a clever girl I am!
HaHa!


Thursday, 25 April 2013

Feed The Neighbours Too Soup

My own recipe so for that reason I have no reservations in sharing the full list on ingredients and not worrying about plagiarism!
 
 
This is basically a 'Souped up' (get it?) Version of my family favourite butternut squash and chorizo soup which is very much what it says it is:
 butternut squash, chorizo sausage and onion sautee'd in olive oil. vegetable or chicken stock cook until squash is tender, attack it with a hand blender (or in my house wizzy wizzy thing) until smooth, add smoked paprika and season with salt and pepper to taste. 
Wait! you are getting 2 recipes for the price of one here!
 
Anyway...
Feed The Neighbours Too Soup Contains....
1 Large butternut squash (deseeded and chopped into cubes approx 1 inch in size, rough guide here no need to get the ruler out)
175g asparagus chopped into 1 inch bits (the only reason its that quantity is that is the amount that was in the packet i bought in sainsburys)
2 chorizo rings (either mild or picante-hot, choose whatever suits your palette) chopped into 1/2 inch bits
2 large white onions chopped roughly
600g cherry tomatoes (again its what i had in my fridge so use as a rough guide)
260g spinach (the amount that was in a pack from sainsburys)
1 large-ish sweet potato chopped into 1 inch pieces
1 tbsp garlic puree or equivalent of chopped garlic
3 heaped tsps of harissa paste
5 chicken stock cubes
3 heaped tsps smoked paprika
salt and pepper to taste
gallons of water (no i mean it if you cook in my quantities you will need approx 10 pints of water)
 
 chuck the veg and chorizo (not the spinach) into a mahoosive stock pot (mine is pretty big but you can reduce quantities to suit your equipment)
with a good glug (accurate measurments as you can see) of olive oil, dont use extra virgin olive oil unless its all you have in the cupboard, its more expensive than basic olive oil and you dont taste any difference in the finished product so why spend the extra pennies?
Sautee the veg and chorizo for about 10 mins and add the garlic and harrissa.
Sautee for another few mins then add the stock cubes and water.
Turn the heat up and bring to the boil. Moderate the heat to a simmer and leave it alone for about 45 mins. (check its not bubbling over now and then)
When the vegetables are tender add the smoked paprika and attack it with the wizzy wizzy hand blender thingy until its smooth. throw the pack of spinach at it and wizzy wizzy one more time. stir it well to make sure you have no lumps of anything hiding at the bottom of the pot and season to taste.
 
I know you see chefs on tv going on and on about seasoning your food properly but believe me it is vital. Taste the soup as you season because you can always add more seasoning but you cant take it away!
Butter a couple of rounds of lovely crusty bread (you might want to try the white cob loaf recipe from Stacey Stewarts book, I like to replace half the flour with wholemeal flour for flavour but do whatever suits you) and tuck in! I'm off to eat mine now... Happy cooking!


Lemon and White Chocolate Muffins

Lemon and white chocolate muffins
 
From Jo Wheatley's book 'Home Baking'
 
 
I was having a nose through the cook books at our local supermarket (if my husband loses me he always checks where the cook books are first) for inspiration for a new blog when I came across Jo Wheatley's 'Home Baking and surreptiously slipped it into the shopping trolley hoping my husband wouldnt see it and launch into another long whinge about the amount of cook books I have. ( Its not that many honestly!!!!) Can I just say in my defence he does not whinge when he is eating the resulting food....
 
In fact I can see him in the kitchen as I type eyeing up the muffins still warm on the cooling rack! Anyway i digress... Book got spotted, whinge ensued and as many people who know us will testify usually happens a bit of a comical bickering match took place which ended in me feigning a serious strop while he collapsed with laughter at the till.... We are really very entertaining and I'm sure the cashiers dont forget us for a while!
O.K. back to the muffins, I picked up the book this morning looking for something I can make for my sons when they come home from school. I don't even get a 'hello mum' before they start asking for something to eat... 'Mummmmmmmm is there something to eat???' If the answer is no then 'Owwwwwwwwwwwwwwww you are ruining my life and starving me!!!!' (I'm shaking my head in dismay as I type this with a half grin on my face because I have the mental image) My children are obviously starved....(uh huh sureeeeeeeee)
 
My trusty old mixing bowl collection complete with measuring cups i dont use because i use my stainless steel ones (but they were so pretty i had to have them) and my flour shaker which was a charity shop find!
 
 
Anyway to combat the usual fridge raiding ruffians appetites i found the recipe for lemon and white chocolate muffins. Now one of my sons is autistic and very very fussy but if i dont tell him there is lemon in it (lemon is fruit and therefore the devil as far as he is concerned) i am hoping that he will only notice the white chocolate and eat them anyway.
Im not kidding this kid can spot a finely chopped herb or citrus fruit zest at 100 paces!
The recipe couldnt be simpler, dry ingredients into a bowl, wet ingredients into a jug whisk wet ingredients, mix dry ingredients, mix the two and voila!
 
I found this set of scales in sainsburys, a steal at £15!
 
Sooooo, here are the bits I struggled with.......90g of unsalted butter melted......yeah but do I need to cool it before I add it to the egg because surely that will start cooking it, thus rendering it incapable of doing its job in the cake (i think its enriching and binding but who the hell knows? - actually I do im just being facetious hehe)
Secondly add the lemon zest and lemon juice to a mix containing milk? Oh hell to the no! Seriously? Ummmm K....
I will give you a tip dear reader if you embark on making this recipe, get everything weighed out in advance because the only way to do the jug of wet ingredients is damned quickly and get it in with the dry ingredients as fast as your lil arms can get a mixing. Or if you are like me and have a food mixer as fast as your food mixer can mix it......which lets face it is pretty darn fast.
 
Lemon and White Chocolate Muffins
 
I cooked them on the mid to low shelf in the oven, I probably could have done with putting them a little bit higher to get a more golden brown top and maybe even a better rise but, here they are in all thier glory, my first attempt at lemon and white chocolate muffins!


Sunday, 21 April 2013

Cot Tidy For Mini Me!


As a parent i can testify to the fact that when you have a child of any age mess is an inevitable part of the package. Mum's the world over fight a daily battle to keep organisation or at least some semblance of it in hand.
I am an avid crafter and in one of my craft magazines i came across a pattern for a cot tidy and while the particular pattern they used didnt appeal to me the idea did. I know you can buy these in such places as mother care etc but they are costly and rarely fit things you actually need within the pockets. So I set about making a cot tidy that would suit my particular needs.
 
Firstly I thought about what we need to have to hand during the night for feeds, nappy changes and so on, i broke it down to the essentials which for us are these:
Nappies
Wipes
Barrier cream (nappy rash cream)
Bottles
 
O.K. So four essential pockets.....
 
I measured the end of the cot and decided how big each pocket should be by simply putting a pack of baby wipes on top of my fabric and using that as a guide for that pocket and well you get the picture...
 
O.K. Mini me has a nautical themed cot so i wanted to stick with this theme while keeping the colours bright and simple. I chose navy blue, white, red, and light blue as my main colours and set about what would end up becoming something of a mission for me.
 
Hemming the backing fabric

Fighting with the sewing machine, it won!

Choose your design and pin the peices in place on the pocket, after trimming the top with bias binding or hemming.

I used a zig zag stitch around the edges of the applique but you can hem the peices individually if you arent as lazy as me...

I wanted this pocket to fit a pack of baby wipes so i made is as deep as a full pack. Sewing the corners twice to make them strong and snipping off the excess fabric inside....
Note this is my second attempt because i did it the wrong way around the first time and had to unpick it...D'oh!
 
Inside the corners

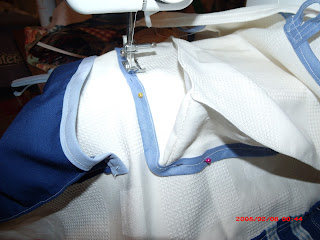
Red bias binding to go around the edges (Bias binding is a good way to neaten up rough edges if hemming isnt your forte)

Stitching the pocket into place on the backing fabric

Close up... Me getting flash with the camera

Next pocket... I decided a life saver would be good here as not only does it go with the nautical theme but there are times during a 4am feed that I could do with saving!
 
 
Pleated pocket
Hem the sides with a running stitch (I double folded mine to avoid rough edges) 
 

Add on the applique and pin in place while you zig zag sew or hem them into place

Trim the top with bias binding to hide rough edges or hem as with the sides

Pleat the bottom (but not the top or you wont get anything into the pockets)

Trim with bias binding ( i also stitched down the pleats to add definition but this isnt essential)

Golden rule to sewing: Iron Iron Iron!!!!!
 
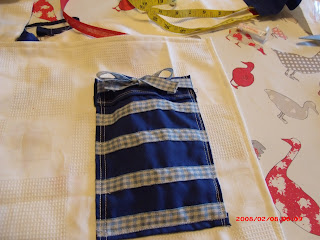
Simple pocket with ribbon sewn on in running stitch then hemmed before sewing onto backing fabric in a running stitch

Another pocket that requires corners...this time i got it right first time!

More bias binding across the top and around the sides

Make a button loop by stitching some bias binding together and attaching to the pocket with a running stitch

Attach to the backing fabric in the same way
 

This is what it looks like at this point arent I clever!!

I embellished the last pocket with my sons name and a few buttons i had hanging around (Its a good job home made upcycled chic was the look i was going for because there is nothing professionally made about this!)


The finished article (yes i know I need to change the time and date on my camera I just havent figured out how yet!)
 
I enjoyed making this and I hope that it lasts the test of time and my sons can use it for their children and tell them their nanna made it! Awwwwww